Setting Up Mail in Mac Mail
This is how you can set up an email account in Mail in MacOS (OS X).
- Launch Mail from your Applications folder.
- If you already have other email accounts set up in Mail, Select Preferences... from the Mail menu. If you haven't set up accounts before, Mail will automatically display the setup screen, so skip to step 4 below.
- Click the Accounts tab and click the + near the bottom of the list of configured account.
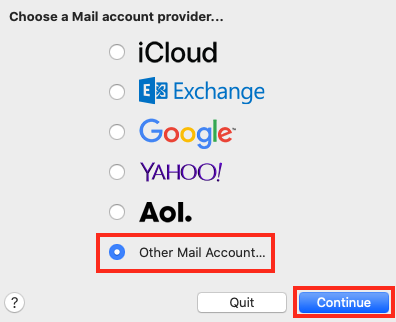
- Select (Add) Other Mail Account...
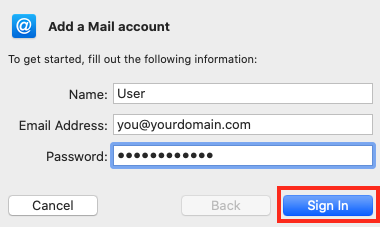
- Enter your email account details.
- The Name should be the personal name you want to appear in people's email clients when you respond to email from this account.
- Your Email Address is the full address, including everything after the @ sign.
- Enter the email account's Password as well.
- Click Sign In to have Mail automatically attempt to figure out the correct settings to access this account. Skip to step 7. If you are using an older version of Mail, the Sign In button will probably be a Next button instead. Click it and continue to step 6.
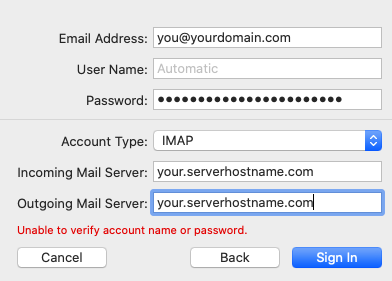
- Mail will probably not be able to entirely figure out your email account settings, so you will be asked to check or enter the appropriate information. In recent versions of Mail, both the inbound and outbound mail settings will be displayed.
- Your Email Address will already be filed in based on whatever you entered in step 5 above. Please review what you've entered to make sure it is correct.
- Mail will try to figure out your User Name automatically, but if there are issues or if you prefer to do so now, you can enter it here, which is usually your full email address, but in some cases many only be the part of your address before the @.
- Your Password should also already be filled in based on what you specified earlier, but you can try re-entering it now if you think you made a mistake.
- The Account Type tells Mail what protocol to use to get your mail from the server. Your choices are IMAP or POP. You can read more about the differences between IMAP and POP here.
- The Incoming and Outgoing Mail Server should typically be one of the following, your mail server's hostname, your personal domain name or mail.yourdomain.com. Often both incoming and outgoing servers are the same.
- In older versions of Mail, you will be taken to separate screens to enter your incoming and outgoing mail server details.
- You'll be asked for the same details as in step 6, but you'll be asked to input only settings for your incoming mail server first, then separately for your outgoing server details.
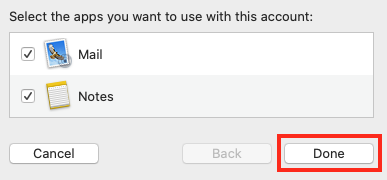
- If Mail is able to connect, you will be able to specify if you want to use this account in both Apple's Mail and Notes applications. Check or uncheck boxes next to each as you prefer then click Done.
Mail will now attempt to download any email that is in the account you just set up.
You may also want to test sending some email from and to this new account in this application just to be sure everything works as expected.


