Make an Update to a Private Template
To update an updated template, you need to deploy a Cloud server using the template you want to change, make the needed changes and then save the revised server as a new template.
Create a Virtual Server
Creating a new Cloud server (also known as a virtual server) is very easy. Log into your Cloud account and then follow the steps below.
- In the sidebar on the left, click on Virtual Servers to go to the virtual server (virtual server) creation and management screen.

- On the top-right side of the Virtual Servers screen, select Build and then Add Virtual Server to start the process of configuring a new virtual server.

- Next, select a template category from the left side of the screen and then select an actual template from the right. This template will specify the OS and default resources of the virtual server.

- Once you've selected your template, click Next on the bottom right of the screen to move on to virtual server configuration.

- On this screen you will enter some important information that will add in the display and deployment of your virtual server. First, enter a Label for this virtual server that will be displayed in your HostDime Cloud Virtual Servers list. The Label does not affect the virtual server itself, it is only a tool to differentiate your virtual servers in this list.

- Next you can enter the hostname of the virtual server you want to create. This will affect the deployed virtual server and should ideally be in a domain you or your clients control.

- You can specify a Domain for the virtual server if you wish. The default is "localdomain." In many instances, that may be fine.

- Finally, you can specify an administrative password for the virtual server if you wish. The password specified here will be the login password for the "root" or "administrative" user for this virtual server. If you don't specify one, our system will automatically create a secure password, which you will be able to view on the virtual server details screen later.

- When you are sure everything on this screen is the way you want it, click Next to continue.

- On the next screen you can specify the resources you'd like to assign to this virtual server. Leave the Compute Zone as-is unless you want to adjust where the virtual server is deployed. You can also leave the Compute Resource as-is. This controls where your virtual server will be deployed.

Now select how much RAM you want the virtual server to have (the minimum is 1 GB), you can type in a number or slide the slider to select what you want. You can also set the total number of CPUs (vCPUs) and CPU Priority the same way. A vCPU is roughly equivalent to 1 CPU core if the priority is set to 100%.

If you want to use CPU autoscaling, make sure you set CPUs to the maximum amount you want your virtual server to be able to use when needed. Then set the CPU Priority to something less than 100%. For example: If you select 4 vCPUs and 50% priority, you'll typically get about 2 vCPUs worth of compute resources, but with autoscale on, your virtual server can automatically use up to 4 vCPUs of compute resources when needed.
Do not bother enabling Use CPU Topology unless you know what you are doing.- You will select the size and type of the primary attached storage under the Primary Disk section. Select the type or location of the storage from the Primary data store drop-down and then either type in a number (with a minimum of 1 GB) or slide the slider to select the size of the primary disk. This will need to be big enough to contain the operating system you've selected, and if the template you selected has an OS installed, the minimum disk size will automatically reflect the correct number.

- If your operating system supports it, you will also be able to specify a separate Swap Disk, which is space that can be used by the operating system if you run out of RAM. Typically, you should specify two times the amount of RAM you've assigned to this virtual server, but the correct number varies by operating system.

- Now you can adjust items that affect the networking on this virtual server:

- Most of the time you can leave the Network, IP net, and IP range settings alone and your virtual server will automatically get assigned one available IPv4 address from the available pool, but you can adjust these settings if needed to have the virtual server pull an IP out of a specific pool.
- The one setting you really should change is Port Speed. This controls how much data your virtual server will be able to send and receive at once. You'll probably want to adjust the slider all the way to the right, which will give you the highest port speed possible.
- The final step before creation of the virtual server will show you the configured resource limits and allow you to set a few final options:

- You can Enable Automated Backup if you'd like to store complete virtual server backups in our Cloud's secondary storage. This allows you to quickly spin up one of the backups if something goes wrong.
- Build Virtual Server will be enabled. If you disable this, then clicking Next below will only create an entry for for this virtual server in your Cloud Portal, but it won't be created yet.
- Boot Virtual Server will also be enabled. This will automatically start the virtual server after our system has created it. If this is disabled then the virtual server will have to be started manually by you at a later time.
- Enable Autoscale functionality (allowing the virtual server to use more CPU, RAM or disk resources if needed).
- Click Create Virtual Server and if you have your virtual server set to build and run automatically, you will be taken to the virtual server screen where you can watch the build and deploy process if you want.

Congratulations, you've successfully deployed a Cloud server in HostDime's Cloud!
Make the Needed Changes to the Running Virtual Server
Log in and make updates or changes as needed.
Don't forget to clean up after yourself. Any unneeded files you don't remove will appear in every virtual server based on the new template you'll save shortly.
Make a Template of a Virtual Server
Make an Update to a Private Template
This is how you access your Cloud server's main page in HostDime's Cloud.
- Log into your CORE account and click Cloud under the Products menu.

- Click the Login to Cloud Portal button.

- Now you will be on our Cloud dashboard page. Click on the Virtual Servers item in the sidebar to switch to a view of your virtual servers.

- You will see a list of all of the virtual servers you've created. Click on the Label for the server you want to work with.

- This will take you to a page where you can see up-to-the-minute statistics and work with your virtual server.
Click Backups – Files

Note, and click Take a Backup

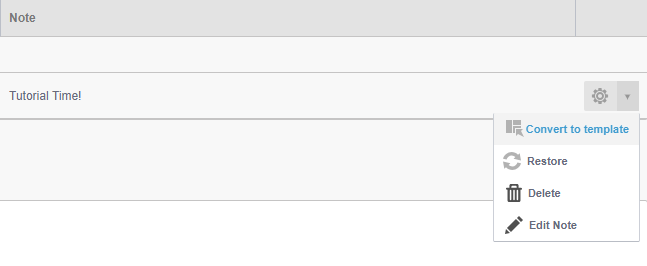
Convert the new backup to a template:
You may want to remove the old template and change the name of the new one to match the original.